Microsoft’s Azure AI Agent Service: What It Is and How to Build Your Own AI Agent
Step by step guide on creating agent using Azure AI Foundry Hub and .NET
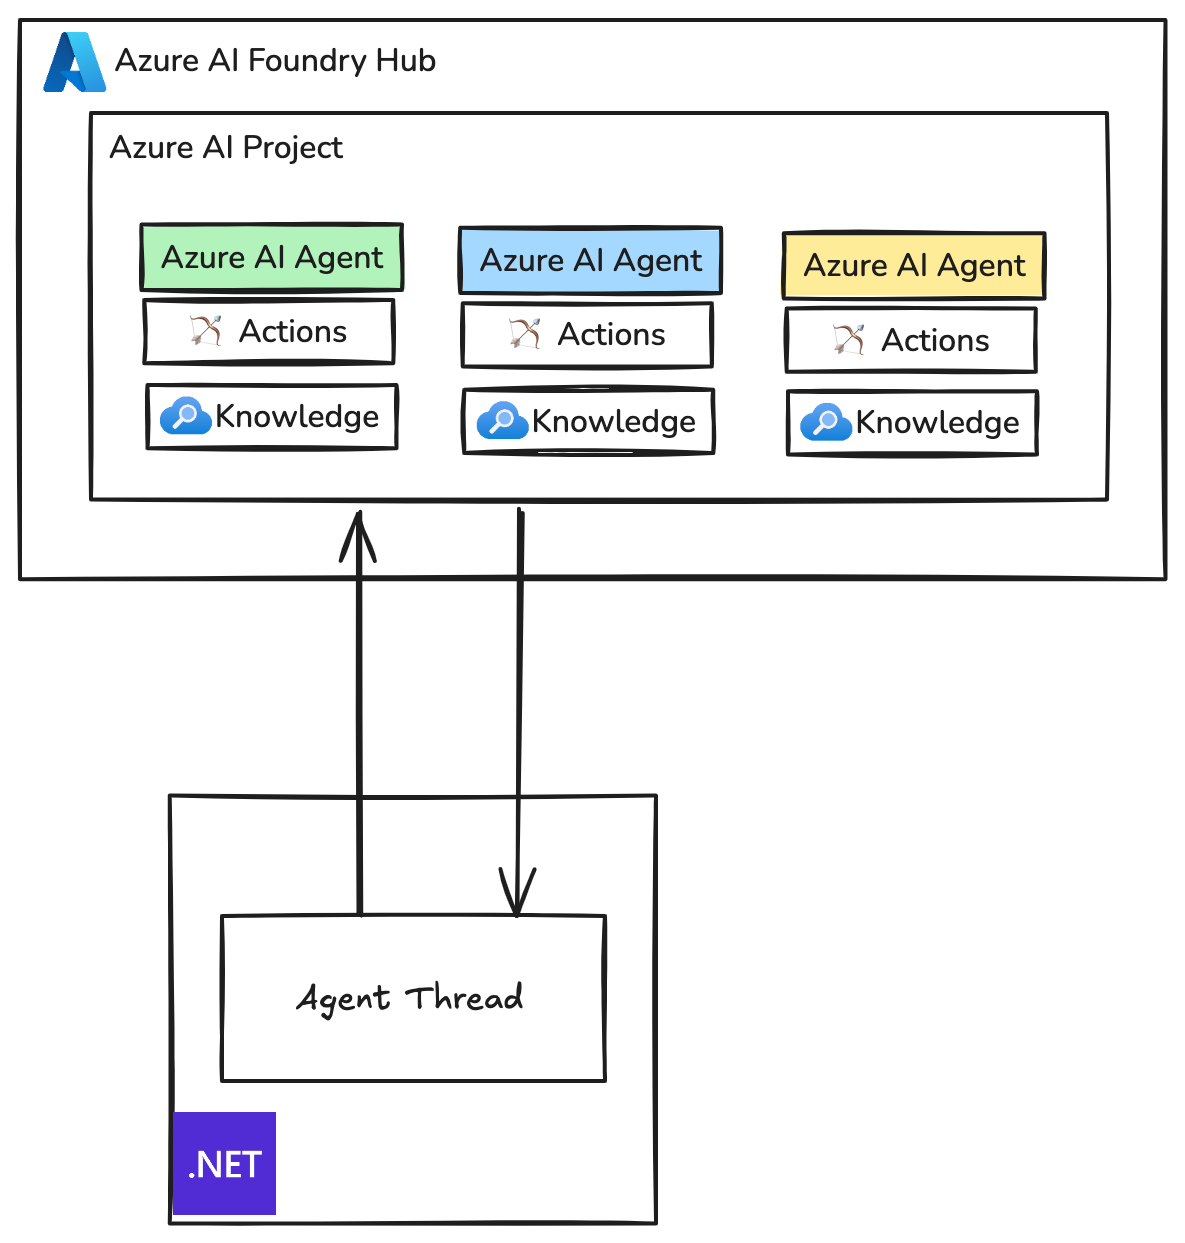
Azure AI Agent Service is a fully managed service from Microsoft that empowers developers to securely build, deploy, and scale high-quality AI agents with low-code tools — eliminating the need to manage complex compute and storage infrastructure. At Microsoft, developers can create agents through various platforms, including Microsoft Copilot, Azure AI Agent Service, and GitHub, while leveraging frameworks like Autogen for ideation and Semantic Kernel for production deployments. What once required writing hundreds of lines of code for client-side function calling can now be achieved with just a few lines, enabling faster innovation with seamless Azure ecosystem integration.
How is Azure AI Agent Service different from OpenAI Assistant?
This is often the first question that comes to mind when learning about Azure AI Agent Service. The Azure AI Agent Service is similar to OpenAI Assistant, but with key differences in extensibility. Azure AI Agent Service allows you to create agents using any LLM model, such as OpenAI, Mistral, DeepkSeek etc., along with enterprise-grade support and security. It also offers seamless integration within the Microsoft and Azure ecosystems.
Deploying agents is now quite easy. I’m going to show a hybrid approach — using a no-code method to create the agent, and a .NET library to integrate those agents into the code.
Let’s deep dive into these steps:
Prerequisites
- Azure Subscription
- Azure AI Foundary Project
- Azure AI Foundary Hub
- [Optional] Azure OpenAI Resource with model deployments
Step 1: Create Azure AI Foundry Hub and Project
A simple explanation: Azure AI Foundry Hub hosts multiple projects. You need to first create a Hub, and then a Project within it.
If you don’t already have an Azure OpenAI resource, you can create one while deploying the Azure AI Project. If you already have an existing Azure OpenAI resource, you can simply reference it during the project creation process.

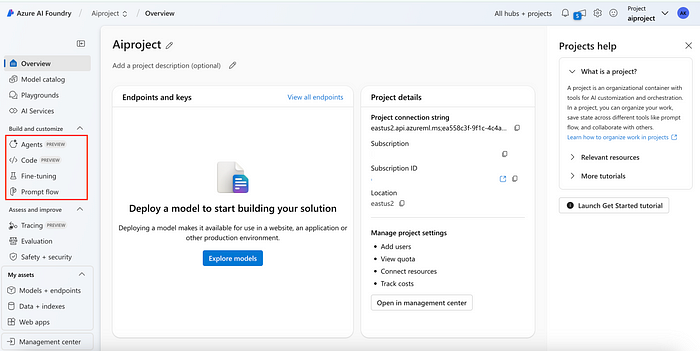
Step 2: Launch Azure AI Foundry Studio from Hub Resource, and you will find “Agents” in left side bar
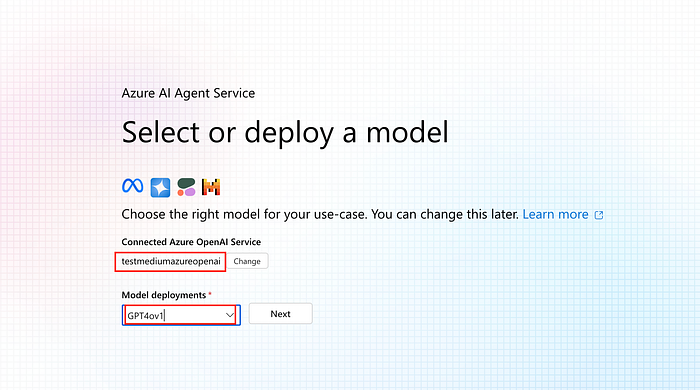
Step 3: Go to agents, and select the GPT Model
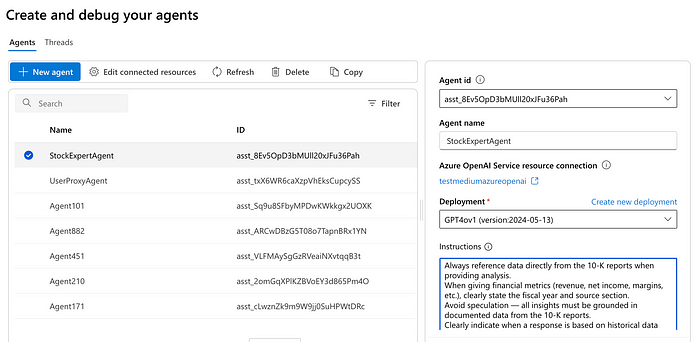
Step 4: Click on new agent, and provide instructions
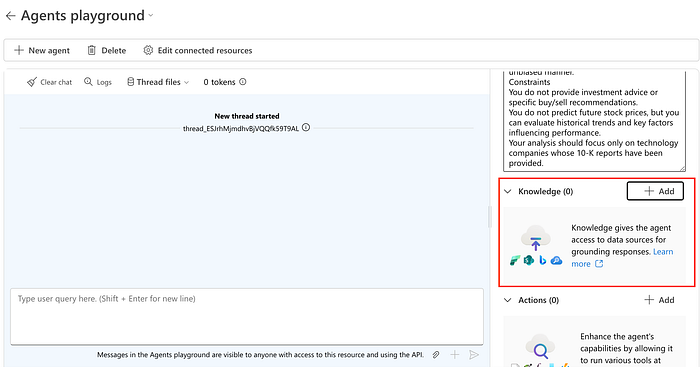
Step 5: Try it in the playground and ground the information using 10-K reports downloaded from different companies.
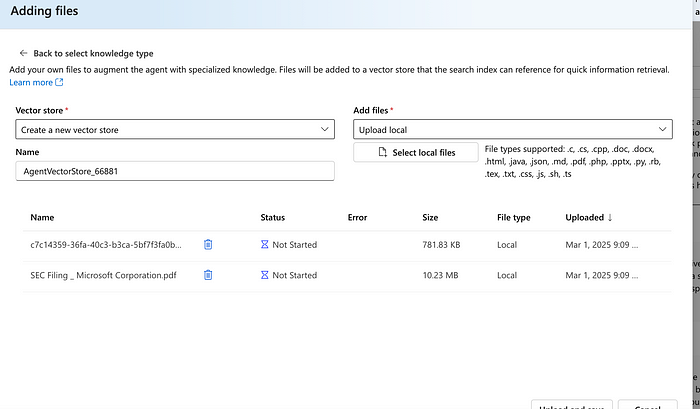
You can just manually upload files and it will create vector store for you. You can also reuse your existing index from AI Search resource.
Step 6: Try this out in the Playground! You will see that it looks into the uploaded file and uses that data to answer questions.

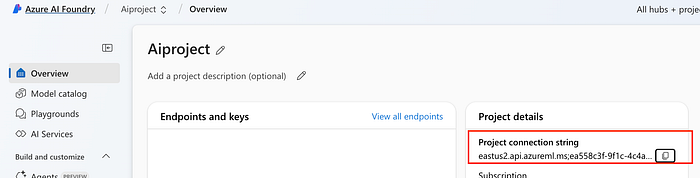
Step 7: Set up a .NET project and initialize the Azure AI client. You will need the connection string for your project, which can be found in the Overview tab.
Step 8: Let’s use this created agent in .NET
#r "nuget: Azure.AI.Projects"
#r "nuget: Azure.Identity"

var credential = new DefaultAzureCredential();

// Create AgentsClient
string connectionString = "<REPLACE_WITH_PROJECT_CONNECTION_STRING>";
var client = new AgentsClient(connectionString, credential);

// Get the created agent using agent id from step 4
string agentId = "<REPLACE_WITH_AGENT_ID>";
await client.GetAgentAsync(agentId);

// Get the agent id from Azure Hub Portal
string agentId = "asst_8Ev5OpD3bMUll20xJFu36Pah";

// Here were are getting the created agent. But you can also create a new agent using CreateAgentAsync method.
Agent agent = await client.GetAgentAsync(agentId);


// create thread and add message to the thread
AgentThread thread = await client.CreateThreadAsync();

// Add user message to the thread
Response<ThreadMessage> messageResponse = await client.CreateMessageAsync(
            thread.Id,
            MessageRole.User,
            "How are earnings looks like as compared to last year for Microsoft?");
        ThreadMessage message = messageResponse.Value;

//<Followed by some boilerplate code to get output from agents. Will share the notebook>
Complete code here — https://github.com/akshaykokane/Azure-AI-Agent-Service-Demo/blob/main/AzureAIAgentServiceDemoRef.ipynb
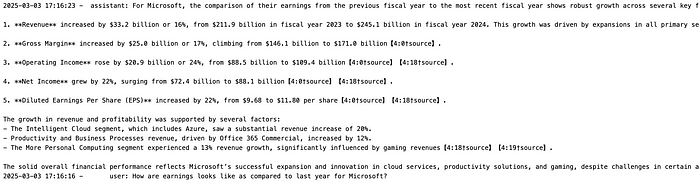
Step 9: See it in Action:
You will notice ai agent used grounded information and answer my question.
What’s Next?
A single agent is powerful — but the real magic happens when multiple agents collaborate seamlessly. In my next blog, I’ll demonstrate how to leverage Semantic Kernel to orchestrate and coordinate multiple agents effectively.
Follow me on LinkedIn and Medium for more exciting AI updates and step by step guides
References:
Thank you for being a part of the community
Before you go:
- Be sure to clap and follow the writer ️👏️️
- Follow us: X | LinkedIn | YouTube | Newsletter | Podcast | Differ
- Check out CoFeed, the smart way to stay up-to-date with the latest in tech 🧪
- Start your own free AI-powered blog on Differ 🚀
- Join our content creators community on Discord 🧑🏻💻
- For more content, visit plainenglish.io + stackademic.com